OpenID Connect Client with Spring Security


On this page
One of the key features of Spring Security 5 was the native support for OAuth2 and OIDC. Making use of the OIDC configuration information (OIDC metadata), integrating with the Curity Identity Server gets super easy. This tutorial shows how to use a registered OAuth client to login via Curity Identity Server and access the user details within an ID-token.
Note
This example is based on the Curity Identity Server, but any server that supports OIDC flows would do.
This tutorial illustrates two different ways for client authentication:
- Basic authentication with a client ID and client secret
- JWT client assertion with a client ID and client key pair
Prerequisites
Make sure you configure a client in the Curity Identity Server before getting started. You must be familiar with the following details:
- Client Id
- Client Secret
- Scopes
- Authorization Grant Type (Capability)
- Redirect URI
Commonly, the authorization server provides you with the client ID and secret as well as the supported scopes for the client. This tutorial runs a client with the Code Flow. Spring Boot generates the redirect URI automatically with the form {baseUrl}/login/oauth2/code/{registrationId}.
In this example, the application is deployed locally and the following values apply:
| Parameter Name | Value in Tutorial |
|---|---|
| Client ID | demo-basic-client |
| Client Secret | Secr3t |
| Scopes | openid, profile |
| Authorization Grant Type | authorization_code |
| Redirect Uri | http://localhost:8080/login/oauth2/code/demo-basic-client |
| Provider | idsvr |
To configure a new client using basic authentication follow the tutorial here: Setup a Client.
Instead of creating the client manually you can merge the following XML with your current configuration.
<config xmlns="http://tail-f.com/ns/config/1.0"><profiles xmlns="https://curity.se/ns/conf/base"><profile><id>token-service</id><type xmlns:as="https://curity.se/ns/conf/profile/oauth">as:oauth-service</type><settings><authorization-server xmlns="https://curity.se/ns/conf/profile/oauth"><client-store><config-backed><client><id>demo-basic-client</id><secret>Secr3t</secret><redirect-uris>http://localhost:8080/login/oauth2/code/demo-basic-client</redirect-uris><scope>openid</scope><scope>profile</scope><user-authentication></user-authentication><capabilities><code/></capabilities><validate-port-on-loopback-interfaces>true</validate-port-on-loopback-interfaces></client></config-backed></client-store></authorization-server></settings></profile></profiles></config>
- Client ID
- Client Asymmetric Keys (Private and Public Key)
- Scopes
- Authorization Grant Type (Capability)
- Redirect URI
The client generates a key pair and registers the public key at the authorization server.
Create and Upload Keys
Run the following commands to create a key pair for the client and to export the certificate with the public key.
keytool -genkey -alias demo-client -keyalg RSA -keystore demo-private-jwt-client.jks -keysize 2048 -dname "CN=Demo Client,O=Example"keytool -exportcert -keystore demo-private-jwt-client.jks -alias demo-client -file demo-client.cer
Then upload the certificate to the Curity Identity Server with the following steps:
- Open Facilities.
- Navigate to Keys and Cryptography.
- Select Signing.
- Click the +-sign next to Signature Verification Keys.
- Enter
demo-client-jwt-verification-keyas the name. - Select
asymmetricas the type. - Choose File from the upload options.
- Upload the certificate file.
- Click Add and Commit to add the key.
The authorization server provides you with the client ID and the supported scopes for the client. This example runs a client with the Code Flow. Spring Boot generates the redirect URI automatically with the form {baseUrl}/login/oauth2/code/{registrationId}.
In this example, the application is deployed locally and the following values apply:
| Parameter Name | Value in Tutorial |
|---|---|
| Client ID | demo-private-jwt-client |
| Client Authentication Method | private_key_jwt |
| Scopes | openid, profile |
| Authorization Grant Type | authorization_code |
| Redirect Uri | http://localhost:8080/login/oauth2/code/demo-private-jwt-client |
| Provider | idsvr |
To configure a client using JWT client assertion for client authentication checkout the tutorial here: Client Authentication using JWTs.
Instead of creating the client manually, you can merge the following XML with your current configuration. Before committing the change, make sure you have a Signature Verification Key called demo-client-jwt-verification-key.
<config xmlns="http://tail-f.com/ns/config/1.0"><profiles xmlns="https://curity.se/ns/conf/base"><profile><id>token-service</id><type xmlns:as="https://curity.se/ns/conf/profile/oauth">as:oauth-service</type><settings><authorization-server xmlns="https://curity.se/ns/conf/profile/oauth"><client-store><config-backed><client><id>demo-private-jwt-client</id><asymmetric-key>demo-client-jwt-verification-key</asymmetric-key><redirect-uris>http://localhost:8080/login/oauth2/code/demo-private-jwt-client</redirect-uris><scope>openid</scope><scope>profile</scope><user-authentication></user-authentication><capabilities><code/></capabilities><validate-port-on-loopback-interfaces>true</validate-port-on-loopback-interfaces></client></config-backed></client-store></authorization-server></settings></profile></profiles></config>
For this tutorial the OpenID Connect metadata of the Curity Identity Server must be published. Spring Boot makes use of the location of the OpenID Connect Provider to load the essential configuration for the integration. In this way you do not have to keep track of all the endpoints. The Curity Identity Server publishes the metadata at {issuerUri}/.well-known/openid-configuration and the value for the issuer URI in this tutorial is as follows:
| Parameter Name | Value in Tutorial |
|---|---|
| OpenID Provider Issuer Uri | https://idsvr.example.com/oauth/v2/oauth-anonymous |
Create a Spring Boot Application
Use the Spring Initializr to create a simple Spring Boot application from scratch. It is a website that assists you to create a new Spring Boot application with the necessary dependencies.
Open start.spring.io in your browser to access Spring Initializr.
In the configuration window that opens, enter io.curity.example for the name of the group and call the artifact demo-client.
Search for and add the following dependencies:
- Spring Security
- OAuth2 Client
- Spring Reactive Web
- Thymeleaf
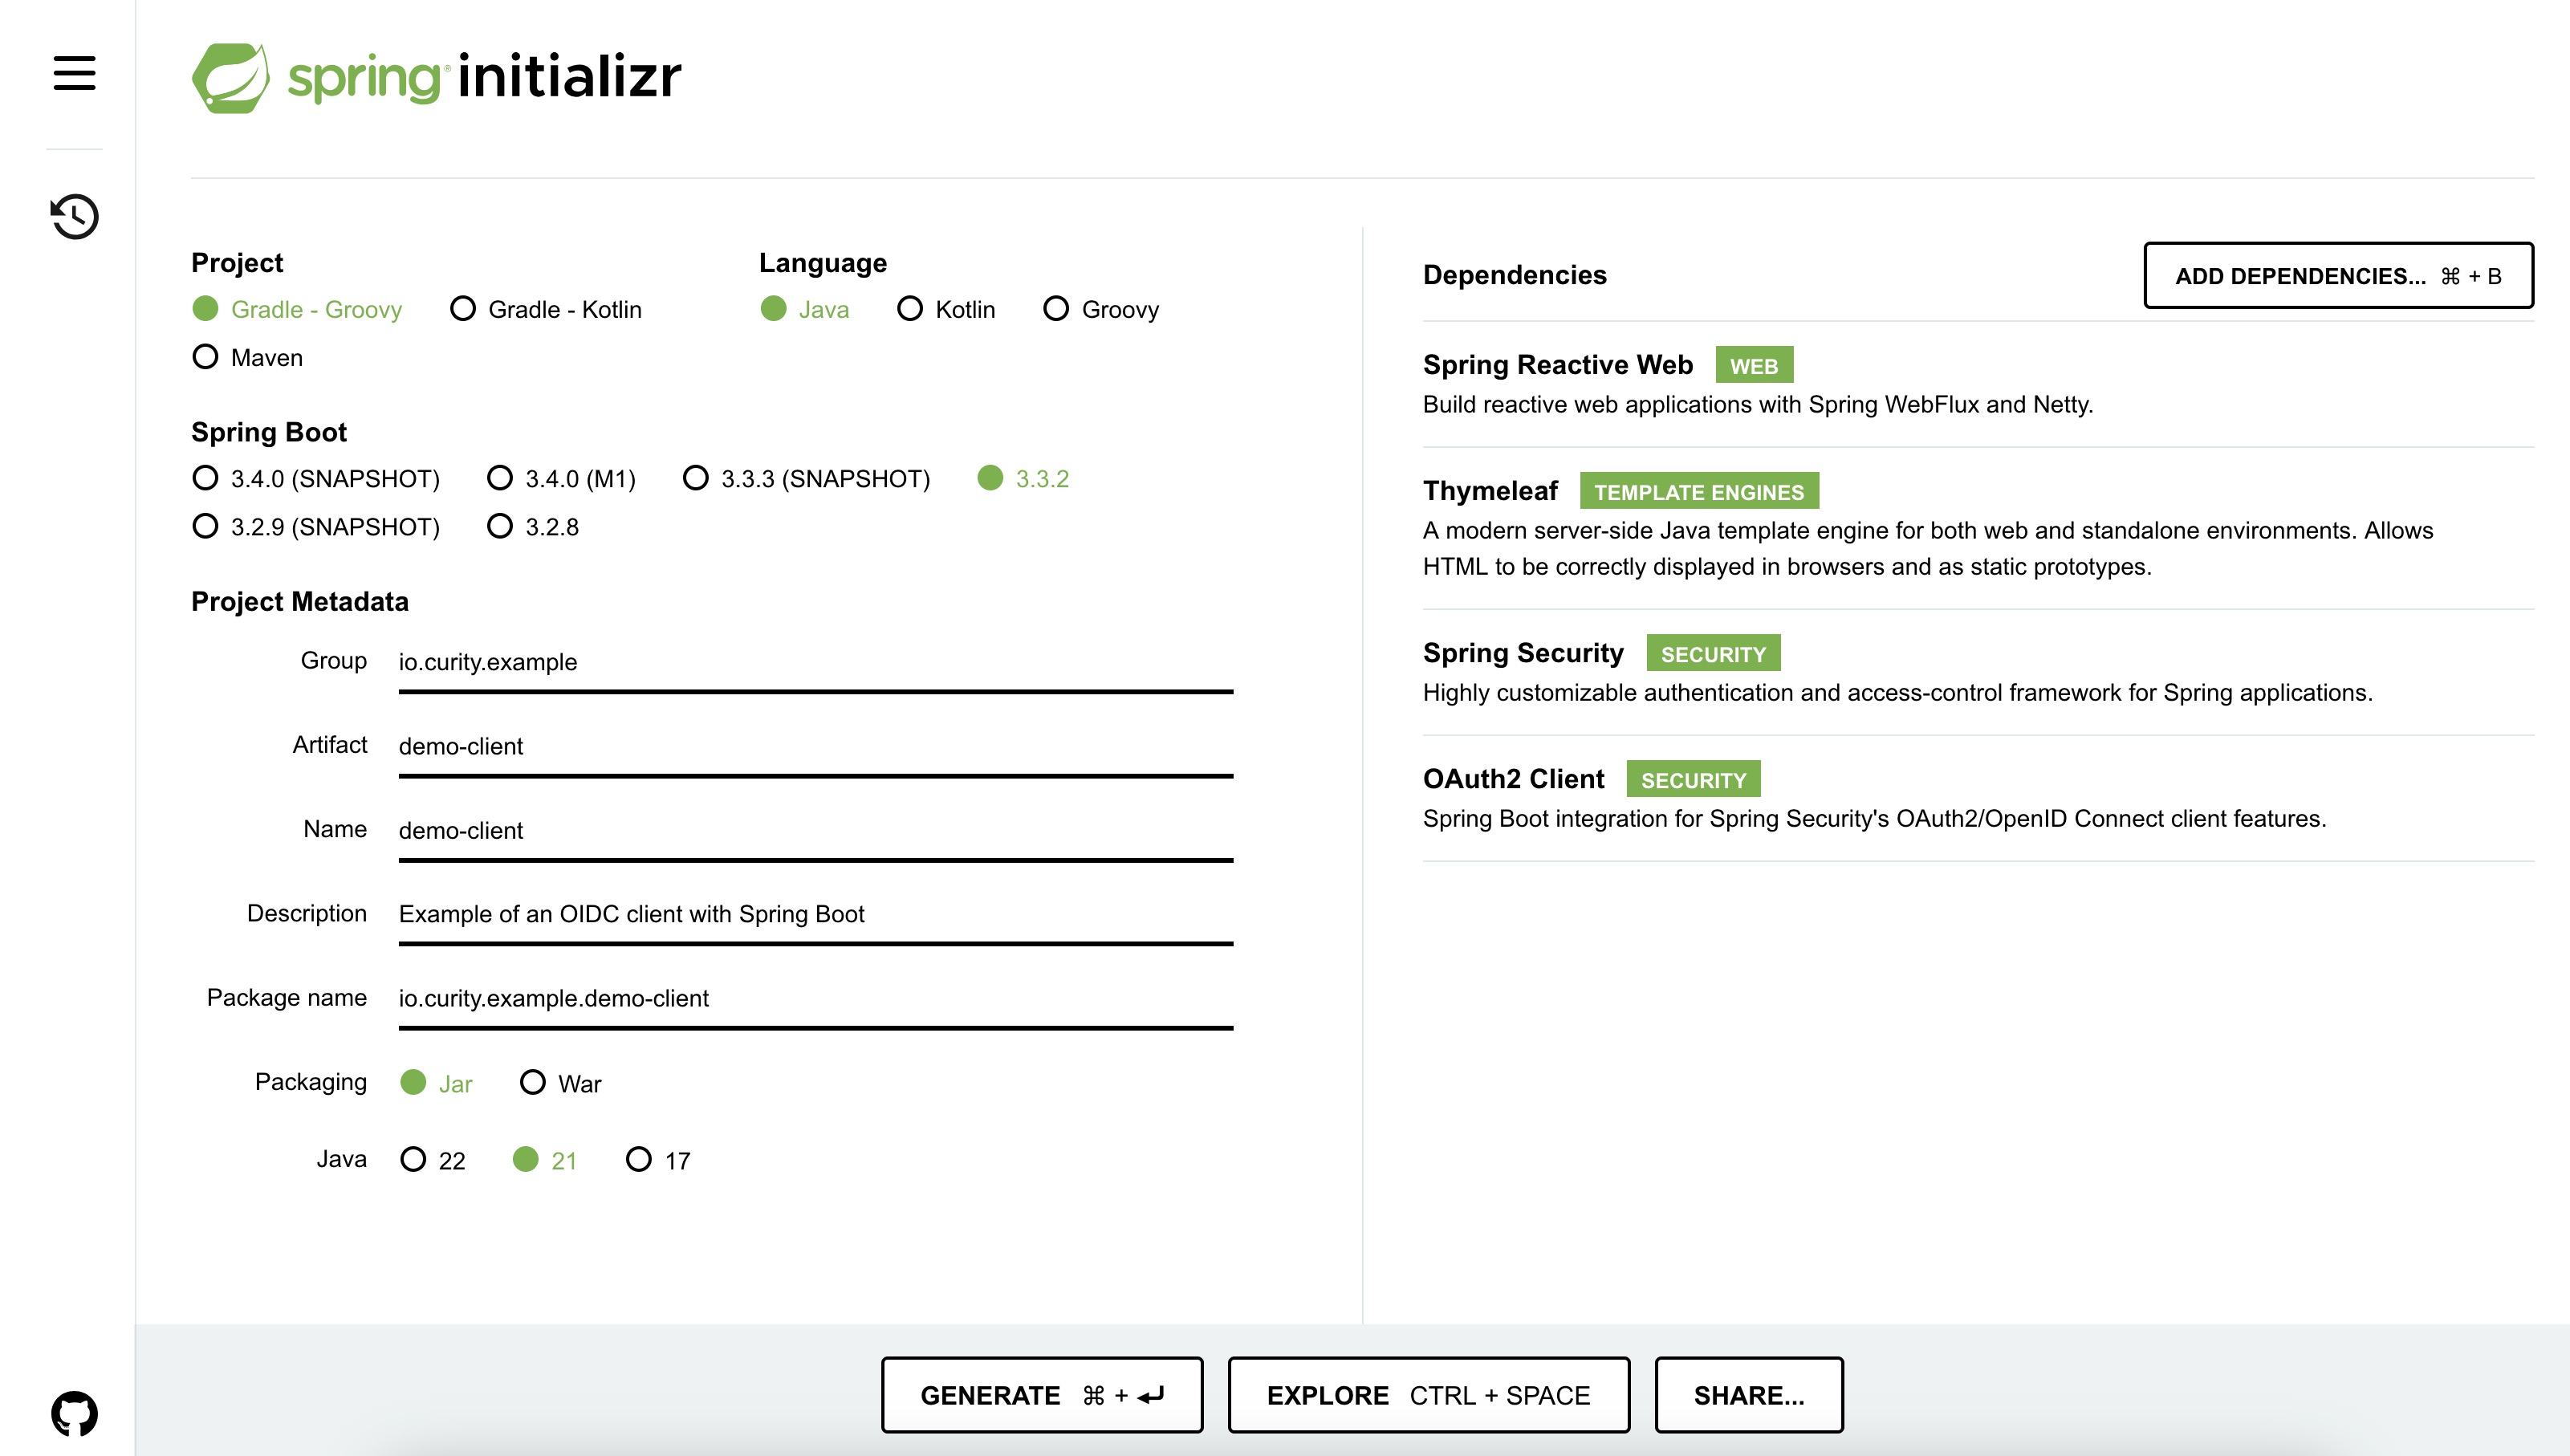
Generate the application. Spring Initializr creates an archive with a bootstrap application that includes the selected dependencies. Download and extract the archive, and import the project in an IDE of your choice.
Add a Starting Site
Provide a starting site that is publicly available. Create the file src/main/resources/templates/index.html. Add a link to the protected resource /user.
<!DOCTYPE html><html lang="en"><head><meta charset="UTF-8"><title>Spring Boot OIDC Demo</title></head><body><h1>Welcome</h1><p>Show me my <a href="/user">user name</a></p></body></html>
Add a Controller
When the user logs in show the username. For that create a controller that handles requests for the endpoint / and /user. Create the file src/java/main/io/curity/example/oidcClient/UserController.java:
@Controllerpublic class UserController {@GetMapping("/")public String index(){return "index";}@GetMapping("/user")public String user(Model model,@AuthenticationPrincipal OidcUser oidcUser) {model.addAttribute("userName", oidcUser.getName());model.addAttribute("audience", oidcUser.getAudience());return "user";}}
For demonstration purpose, print out the application that triggered the login.
Create a template called user.html next to index.html. Output the attributes for the username and client ID.
<!DOCTYPE html><html xmlns="http://www.w3.org/1999/xhtml"><head><title>Spring Boot OIDC Demo - Login</title><meta charset="utf-8" /></head><body><h1>Your Login Details</h1><div>Welcome <span style="font-weight:bold" th:text="${userName}"/>!You logged in at the OAuth 2.0 Client <span style="font-weight:bold" th:text="${audience}"/>.</div></body></html>
Protect the User Area
So far there are two endpoints: / and /user. However, both are still unprotected. Create another class, that enforces OAuth for certain paths. Create the file src/java/main/io/curity/example/democlient/OAuth2SecurityConfig.java with the following content:
@Configurationpublic class OAuth2SecurityConfig {@BeanSecurityWebFilterChain springSecurityFilterChain(ServerHttpSecurity http) {http.authorizeExchange(exchanges ->exchanges.pathMatchers("/", "/error").permitAll().anyExchange().authenticated()).oauth2Login(withDefaults());return http.build();}}
This enables and configures Spring Web Security. The endpoints / and /error are public. Any other requests must be authenticated using OAuth. Spring Security creates a default login page at /login that lists all the login options. When running the example from GitHub, there are two options:
- Login with the Curity Identity Server (Basic Client)
- Login with the Curity Identity Server (Private JWT Client)
Configure the OAuth Client
Define the following client in src/main/resources/application.yml:
spring:security:oauth2:client:registration:demo-basic-client:client-name: Login with the Curity Identity Server (Basic Client)client-id: demo-basic-clientclient-secret: Secr3tauthorization-grant-type: authorization_coderedirect-uri: "{baseUrl}/login/oauth2/code/{registrationId}"scope: openid, profileprovider: idsvrprovider:idsvr:issuer-uri: https://idsvr.example.com/oauth/v2/oauth-anonymous
This triggers Spring Boot to register a client. The client registration gets the id demo-basic-client which is part of the (default) redirect-uri.
The remaining properties, client-id, client-secret, authorization-grant-type and scope, have been defined when configuring the client in the Curity Identity Server (see Prerequisites). You can choose any descriptive client-name. This is the string that is used in the default login page setup at /login.
Define the following client in src/main/resources/application.yml
spring:security:oauth2:client:registration:demo-private-jwt-client:client-name: Login with the Curity Identity Server (Private JWT Client)client-id: demo-private-jwt-clientclient-authentication-method: private_key_jwtauthorization-grant-type: authorization_coderedirect-uri: "{baseUrl}/login/oauth2/code/{registrationId}"scope: openid, profileprovider: idsvrprovider:idsvr:issuer-uri: https://idsvr.example.com/oauth/v2/oauth-anonymous
This triggers Spring Boot to register a client. The client registration gets the id demo-private-jwt-client which is part of the (default) redirect-uri.
The remaining properties, client-id, authorization-grant-type and scope, have been defined when configuring the client in the Curity Identity Server (see Prerequisites). You can choose any descriptive client-name. This is the string that is used in the default login page setup at /login.
The client uses a private key to sign a JWT as part of the authentication method. You need to load the key somehow. This example provides some configuration options, where the private and public key of the client reside in a key store file, but you may choose any other option that suits your use-case. The following snippet configures the client to load the key demo-client from the key store file resouces/demo-private-jwt-client.jks:
client:authentication:asymmetric-key:key-store-file-name: demo-private-jwt-client.jkskey-store-password: changeitkey-store-alias: demo-clientkey-store-type: jks
The methods on how to create or load keys in Java is out of scope of this tutorial. You may check out the source code in the related repository to study an example.
When you have the keys, set up a WebClientReactiveAuthorizationCodeTokenResponseClient with a resolver that returns the JSON web key for the cryptographic operation. Study the following lines of the OAuth2SecurityConfig.java for inspiration:
// Provides the JSON web key that is used to sign the client JWT assertionFunction<ClientRegistration, JWK> jwkResolver = (clientRegistration) -> {if (clientRegistration.getClientAuthenticationMethod().equals(ClientAuthenticationMethod.PRIVATE_KEY_JWT)) {// clientKeys is the KeyPair of the client that was loaded from the key storePublicKey publicKey = clientKeys.getPublic();PrivateKey privateKey = clientKeys.getPrivate();return new RSAKey.Builder((RSAPublicKey) publicKey).privateKey(privateKey).keyID(UUID.randomUUID().toString()).build();}return null;};@Beanpublic WebClientReactiveAuthorizationCodeTokenResponseClient webClientReactiveAuthorizationCodeTokenResponseClient() {var tokenResponseClient = new WebClientReactiveAuthorizationCodeTokenResponseClient();// Initialize the parameter converter with the JWK resolvervar converter = new NimbusJwtClientAuthenticationParametersConverter<OAuth2AuthorizationCodeGrantRequest>(jwkResolver);tokenResponseClient.addParametersConverter(converter);return tokenResponseClient;}
Check out the source code of the example for the complete implementation.
Spring Boot Security loads all the necessary OpenID configuration from the metadata at https://idsvr.example.com/oauth/v2/oauth-anonymous/.well-known/openid-configuration and ensures that the user-agent gets redirected to the right endpoints for authentication.
Run the Demo Application
Start the demo application with ./gradlew bootRun
Navigate to http://localhost:8080 to access the index site.
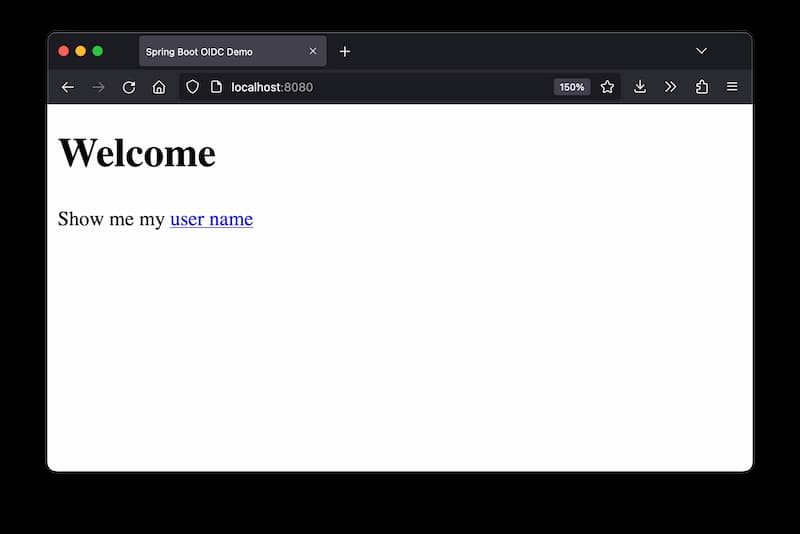
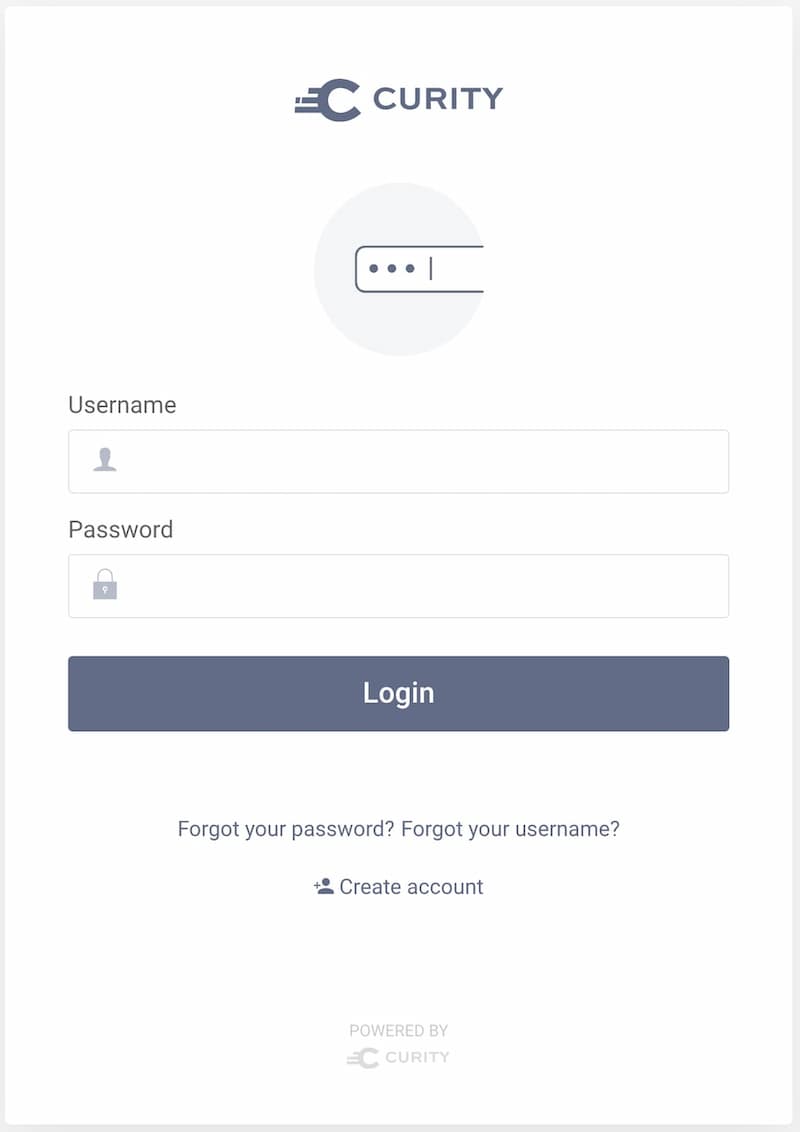
Click on the link to access http://localhost:8080/user that triggers a login.
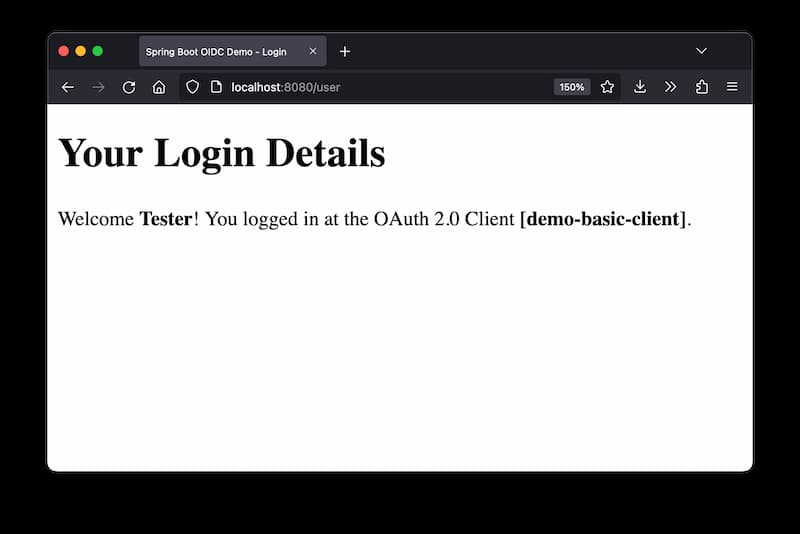
After successful login the page shows details retrieved from the ID token.
You can also navigate to http://localhost:8080/login to directly access the default login page created by Spring Security.
Conclusion
Using Spring Security together with the Curity Identity Server you can easily secure your application with OAuth2 and OpenID Connect. As a developer you only have to add a client registration using the parameters received from an administrator of the Curity Identity Server and enable OAuth2 support for your application. You can access any attributes in the ID token through @AuthenticationPrincipal and OidcUser.class or use @RegisteredOAuth2AuthorizedClient and OAuth2AuthorizedClient.class for retrieving the access token obtained by the client that you may forward to downstream APIs.
For further examples and help regarding OAuth2 and Spring Security for a reactive web application visit Spring Security Reference Documentation.
Also check out the tutorial on mutual TLS client authentication using Spring Boot: OIDC Client with Mutual TLS Client Authentication
Customer Stories
Learn how organizations run identity and API security at scale.
Read customer storiesWas this helpful?